
Geiode Lighting
Technical and Installation Guide
Delve into the technical facets of Geiode, a game-changer in the architectural lighting industry.
Delve into the technical facets of Geiode, a game-changer in the architectural lighting industry. A true feat of engineering and design, Geiode is a concrete luminaire recessed directly into structural concrete slabs. Each piece is meticulously molded from reinforced structural concrete, boasting a compressive strength equal to or exceeding 35MPa for unrivaled durability. Infused with polypropylene fibers, Geiode provides increased structural integrity and longevity. Furthermore, each Geiode unit is equipped with one or more junction boxes securely affixed to the concrete luminaire, housing all essential electrical components. Experience the perfect blend of technology and design with Geiode, where function and aesthetics unite.
Installation Instructions:
- Before Pouring the Ceiling Concrete:
1- Based on the electrical drawings and reflected ceiling plans (RCP), lay out and mark the exact location of the Geiodes on the ceiling form once it's in place and leveled. Once the bottom layers of rebar are placed, secure the Geiodes to the form beneath using four wood screws going through the brackets. Ensure no gaps exist between the concrete portion and the form to prevent Geiodes from filling with concrete.
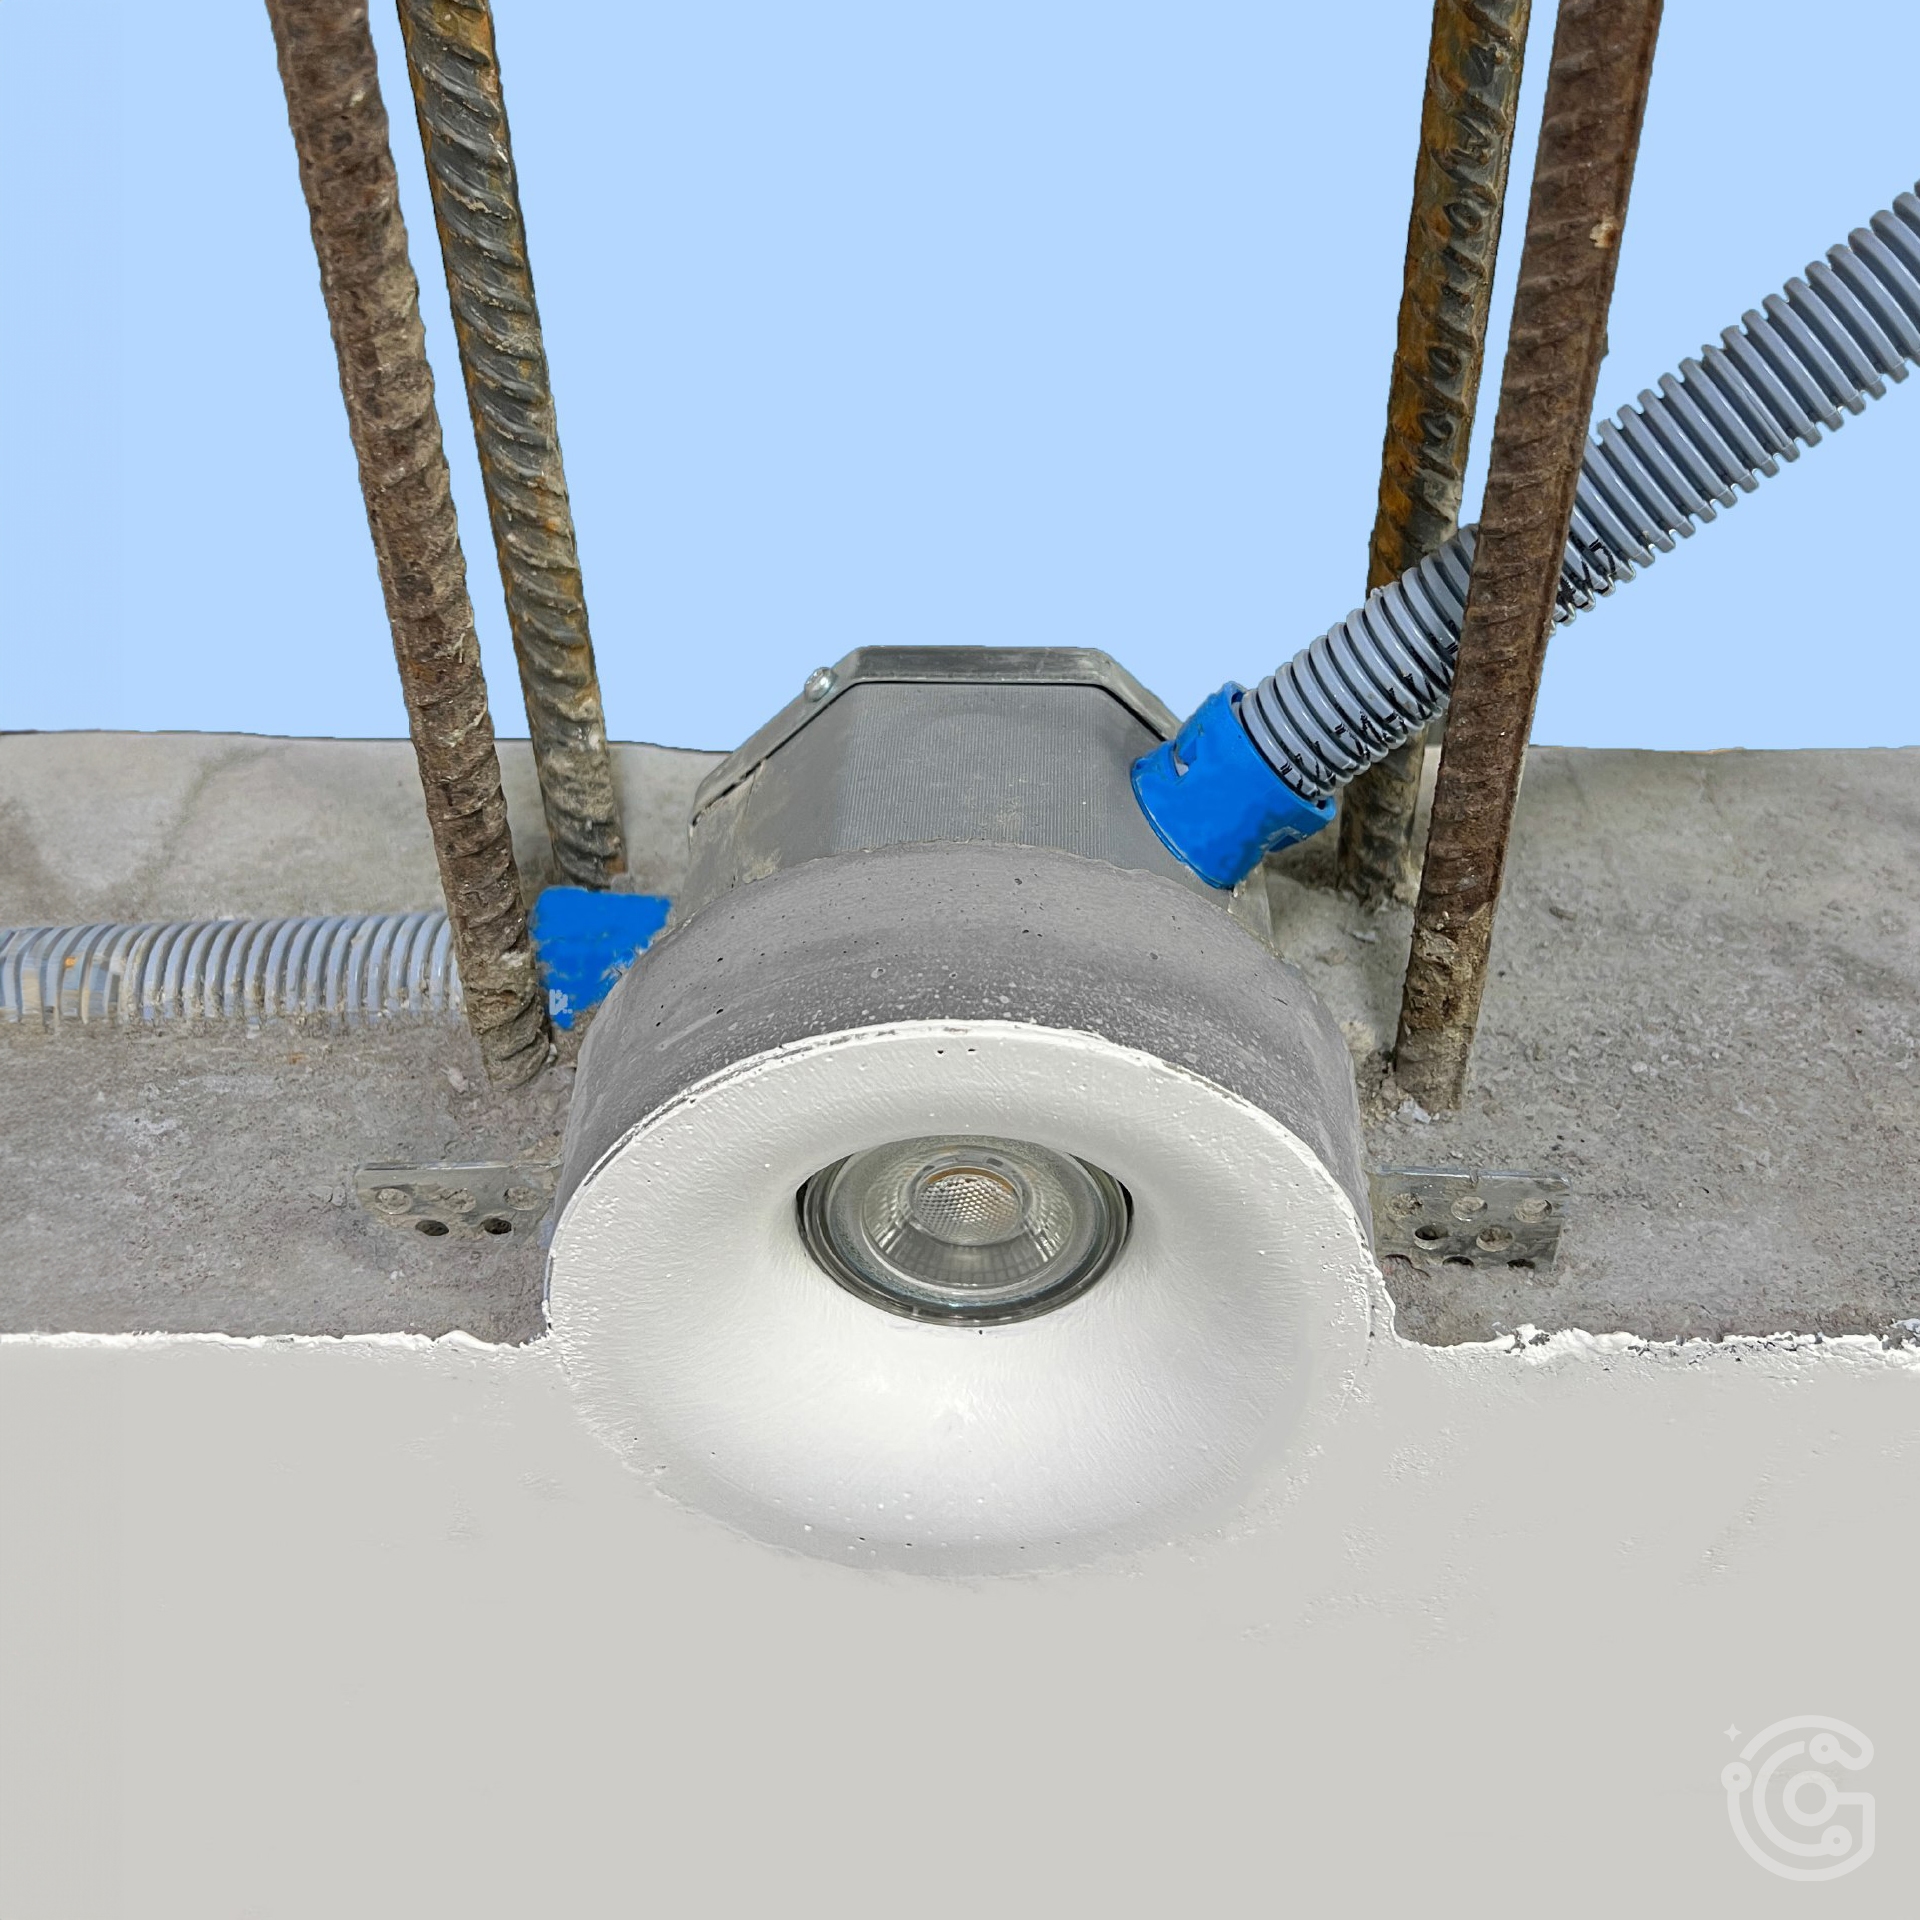
2- Prepare the junction box for electrical conduit connections. Remove the lid on the junction box and connect the ceiling electrical conduits according to the electrical drawings. After ensuring all conduit connections are tightly fastened, secure the lid back on the junction box.
At this stage, the ceiling reinforcement can be completed, and concrete can be poured. The ceiling formwork should be removed once the concrete has cured.
3- Cut protruding tips of the wood screws from the ceiling concrete using an angle grinder or oscillating saw. Peel off the paper label from the concrete portion and lower the metallic cylinder. Draw circuit wires into the conduits through the luminaire hole as per the building electrical drawings. Connect these wires to the Geiode lampholder and ground wires, securing them with twist-on wire connectors. 4- Push the connected wires and connector caps back into the luminaire hole, ensuring they don't block the cylinder's route or luminaire hole. Insert the cylinder into the luminaire hole and secure it by twisting at the end of the hole. Finally, provide two standard GU10 bulbs, connect them to the lamp holder, and install them into the luminaire hole by pushing and twisting clockwise.
For a more comprehensive understanding of the Geiode installation process, we highly recommend referring to the pictorial instructions provided. These graphical guides complement the step-by-step instructions above and offer visual aids that detail each stage of installation specific to each Geiode series. Cross-referencing these pictorial instructions with the text guide ensures a clearer grasp of the process and contributes to a more effective and efficient installation experience. Please make sure to identify the series of your Geiode to match the appropriate pictorial instruction.Remember to refer to any additional, specific instructions provided by the Geiode manufacturer and local building regulations.
- GC12XX Installation manual - GC25XXD Installation manual - GC38XXT Installation manual


